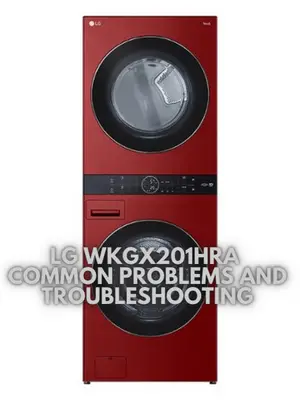
LG WKGX201HRA Common Problems and Troubleshooting
Experience the LG WKGX201HRA, a full-size and fully-featured washing machine and dryer combo designed to optimize space and provide advanced cleaning power. This article will address common problems and troubleshooting solutions specific to the LG WKGX201HRA model.
LG WKGX201HRA Overview
Built with innovation and convenience in mind, the LG WKGX201HRA offers a host of features to make your laundry routine a breeze. With a capacity of 4.5 cu. ft. in the washer and 7.4 cu. ft. in the dryer, you can tackle large loads in less time. The Center Control panel, positioned at the perfect height, allows easy access to both washer and dryer controls.
Product Details
| Product Height | Product Width | Product Depth | High-Efficiency | Washer/Dryer Combo Type | Washer Load Type | Propane Conversion Kit Model Compatibility | App-Controlled | Color Finish |
|---|---|---|---|---|---|---|---|---|
| 74 3/8 inches | 27 inches | 30 3/8 inches | Yes | Stacked units | Front load | 383EEL3002D | Yes | Red |
Features
- Ultra Large Capacity 4.5 cu. ft. Washer and 7.4 cu. ft. Dryer
- Single Unit WashTower Design¹
- ThinQ Care
- Built-In Intelligence
- Advanced washing and drying
- AAFA Certified LG Washer
- ThinQ Technology and ThinQ Care
- Tempered Glass Doors with Trim
- Direct Drive Motor 10-Year Limited Warranty
- ENERGY STAR Certified
- FlowSense Duct Clogging and Lint Filter Indicators
- NeveRust Stainless Steel Tub
- TubClean System
- TrueBalance Anti-Vibration System
- LoDecibel Quiet Operation
- Wrinkle Care Option
- SpeedWash Cycle
- Gas connector and vent kit are sold separately and are not included.
Causes of Common Problems with the LG WKGX201HRA
This section will discuss various problems that users may encounter with the LG WKGX201HRA washing machine and provide troubleshooting solutions.
1. Washer Not Draining Properly
Description: The washer fails to drain water after completing a wash cycle.
Cause: There could be a blockage in the drain hose or a malfunctioning drain pump.
Troubleshooting:
- Check the drain hose for any kinks or clogs. Remove any obstructions if found.
- Inspect the drain pump for any debris or damage. Clean or replace the drain pump if necessary.
- Ensure that the drain hose is properly connected to a drain pipe or standpipe.
- Run a test cycle to verify if the issue has been resolved.
2. Dryer Not Heating
Description: The dryer runs, but it fails to produce heat.
Cause: The heating element may be faulty or there could be an issue with the thermal fuse.
Troubleshooting:
- Check if the dryer is properly plugged in and receiving power.
- Inspect the heating element for any signs of damage or breakage. Replace the heating element if needed.
- Check the thermal fuse for continuity using a multimeter. Replace the thermal fuse if it is blown.
- Ensure that the dryer vent is not blocked or restricted, as this can cause overheating and lead to the thermal fuse blowing.
- Run a test cycle to confirm if the dryer is now heating properly.
3. Error Code E1 (Water Inlet Issue)
Description: The washer displays error code E1, indicating a problem with the water inlet.
Cause: There might be a blockage in the water inlet valve or an issue with the water pressure.
Troubleshooting:
- Check if the water supply is turned on and the water pressure is adequate.
- Inspect the water inlet valve for any obstructions. Clean or replace the valve if necessary.
- Verify that the water inlet hoses are properly connected and not kinked or damaged.
- Reset the washer by unplugging it from the power source for a few minutes and then plugging it back in.
- If the issue persists, contact customer support for further assistance.
4. Excessive Vibration during Spin Cycle
Description: The washer vibrates excessively and moves around during the spin cycle.
Cause: The washer may not be level or the load inside the drum is unbalanced.
Troubleshooting:
- Ensure that the washer is placed on a stable and level surface.
- Adjust the leveling feet at the bottom of the washer to achieve proper balance.
- Distribute the load evenly inside the drum to avoid unbalanced spinning.
- Reduce the load size if it exceeds the recommended capacity for the washer.
- If the problem persists, consider using anti-vibration pads or contacting customer support for further assistance.
5. Foul Odor in the Washer
Description: There is a persistent unpleasant odor coming from the washer.
Cause: Residual moisture and detergent residue can accumulate and cause bacteria growth.
Troubleshooting:
- Run a cleaning cycle using a washer cleaner or a mixture of vinegar and baking soda.
- After each wash, leave the washer door open for ventilation and allow it to dry completely.
- Regularly clean the rubber door gasket and drum to remove any residue or mold buildup.
- Avoid using excessive detergent and follow the manufacturer’s guidelines for proper detergent usage.
- If the odor persists, consider contacting customer support for further assistance.
6. Washer Not Spinning
Description: The washer fails to spin the clothes during the cycle.
Cause: The drive belt or motor coupling may be worn out or broken.
Troubleshooting:
- Check the drive belt and motor coupling for any signs of damage. Replace them if necessary.
- Ensure that the washer is not overloaded, as excessive weight can prevent proper spinning.
- Inspect the lid switch to ensure it is functioning correctly. A faulty lid switch can also prevent the washer from spinning.
- Run a test cycle with a smaller load to see if the spinning issue is resolved.
7. Dryer Takes Too Long to Dry Clothes
Description: The dryer requires an extended drying time to fully dry the clothes.
Cause: There may be a clog in the dryer vent or an issue with the heating element.
Troubleshooting:
- Check for any lint buildup in the dryer vent and remove it using a vent cleaning brush or vacuum.
- Inspect the heating element for any signs of damage or malfunction. Replace it if necessary.
- Ensure that the dryer is properly ventilated and that the exhaust airflow is not restricted.
- Use the appropriate drying cycle and adjust the drying settings based on the type and size of the load.
- If the problem persists, consider contacting a professional technician for further inspection.
8. Washer Not Dispensing Detergent or Fabric Softener
Description: The washer does not dispense detergent or fabric softener during the cycle.
Cause: The detergent dispenser or the dispenser valve may be clogged or damaged.
Troubleshooting:
- Remove the detergent dispenser drawer and clean it thoroughly to remove any blockages or residue.
- Inspect the dispenser valve for any debris or damage. Clean or replace the valve if necessary.
- Ensure that the detergent or fabric softener is added to the appropriate compartment of the dispenser drawer.
- Check the water pressure to ensure it is sufficient for proper dispenser operation.
- Run a test cycle to verify if the detergent and fabric softener are dispensing correctly.
9. Error Code UE (Unbalanced Load)
Description: The washer displays error code UE, indicating an unbalanced load.
Cause: The load inside the washer may be unevenly distributed or too small.
Troubleshooting:
- Stop the cycle and redistribute the clothes inside the drum to achieve a more balanced load.
- Ensure that the washer is not overloaded or underloaded. Follow the recommended load capacity for optimal performance.
- Check that the leveling feet are properly adjusted to keep the washer stable.
- Run the cycle again to see if the error code UE is resolved.
10. Excessive Noise during Operation
Description: The washer or dryer produces loud or unusual noises during operation.
Cause: Loose or worn-out components, such as drum bearings or motor mounts, can cause excessive noise.
Troubleshooting:
- Check for any loose screws or bolts and tighten them securely.
- Inspect the drum bearings and motor mounts for signs of wear. Replace them if necessary.
- Ensure that the washer or dryer is level and properly balanced.
- Remove any objects or debris that may have fallen into the drum or dryer vent.
- If the noise persists, consider contacting customer support or a professional technician for further assistance.
11. Washer Not Filling with Water
Description: The washer fails to fill with water at the beginning of the cycle.
Cause: The water inlet valve may be clogged or malfunctioning.
Troubleshooting:
- Check that the water supply is turned on and the hoses are properly connected.
- Inspect the water inlet valve screens for any debris. Clean or replace the valve if necessary.
- Ensure that the water pressure is adequate for proper water flow into the washer.
- Run a test cycle to see if the issue is resolved.
12. Dryer Overheating
Description: The dryer becomes excessively hot during operation.
Cause: There may be a blockage in the dryer vent or a malfunctioning thermostat.
Troubleshooting:
- Check for any lint buildup in the dryer vent and remove it using a vent cleaning brush or vacuum.
- Inspect the thermostat for any signs of damage or malfunction. Replace it if necessary.
- Ensure that the dryer is properly ventilated and that the exhaust airflow is not restricted.
- Monitor the dryer temperature during operation to ensure it stays within a safe range.
- If the issue persists, consider contacting a professional technician for further inspection.
13. Washer Door Won’t Open
Description: The washer door remains locked and cannot be opened after the cycle.
Cause: The door lock mechanism may be malfunctioning or there could be an issue with the control board.
Troubleshooting:
- Check if the washer is still running a cycle. If so, wait for it to complete before attempting to open the door.
- Make sure there is no water inside the drum. If necessary, run a drain cycle to remove any excess water.
- Try unplugging the washer from the power source for a few minutes, then plug it back in to reset the control board.
- If the door still won’t open, consult the user manual for instructions on manually releasing the door lock.
- If none of the above steps work, contact customer support for further assistance.
14. Error Code dE (Door Error)
Description: The washer displays error code dE, indicating a problem with the door.
Cause: The door may not be securely closed or the door switch may be faulty.
Troubleshooting:
- Check that the washer door is fully closed and latched properly.
- Inspect the door switch for any damage or loose connections. Replace the switch if necessary.
- Ensure that there are no obstructions preventing the door from closing properly.
- Restart the washer to see if the error code dE clears.
- If the problem persists, consider contacting customer support for further assistance.
15. Excessive Suds in the Washer
Description: The washer produces an excessive amount of suds during the wash cycle.
Cause: Using too much detergent or using the wrong type of detergent can cause excessive sudsing.
Troubleshooting:
- Follow the detergent manufacturer’s recommended dosage for your specific load size.
- Switch to a low-sudsing or high-efficiency (HE) detergent designed for front load washers.
- Run an additional rinse cycle to remove excess suds from the clothes.
- Clean the washer drum and dispenser to remove any detergent buildup.
- Adjust the detergent usage based on the water hardness and load size to prevent future sudsing issues.
16. Washer Not Agitating
Description: The washer drum does not agitate or move during the wash cycle.
Cause: The drive belt or motor coupling may be worn out or broken.
Troubleshooting:
- Check the drive belt and motor coupling for any signs of damage. Replace them if necessary.
- Ensure that the washer is not overloaded, as excessive weight can prevent proper agitation.
- Inspect the agitator for any obstructions or debris. Clean or replace it if needed.
- Verify that the lid switch is functioning correctly, as a faulty switch can also prevent agitation.
- Run a test cycle to confirm if the agitating issue is resolved.
17. Dryer Not Turning On
Description: The dryer does not start or respond when the power button is pressed.
Cause: There may be a problem with the power supply, door switch, or control board.
Troubleshooting:
- Ensure that the dryer is properly plugged into a functioning power outlet.
- Check the door switch to ensure it is making proper contact when the door is closed.
- Inspect the control board for any visible signs of damage or loose connections. Replace it if necessary.
- Reset the dryer by unplugging it from the power source for a few minutes, then plug it back in.
- If the dryer still does not turn on, contact customer support or a professional technician for further assistance.
18. Washer Producing Error Code OE (Drainage Issue)
Description: The washer displays error code OE, indicating a problem with the drainage.
Cause: The drain hose may be clogged or improperly installed, or there may be a problem with the drain pump.
Troubleshooting:
- Check the drain hose for any obstructions or kinks. Straighten or clean the hose as needed.
- Ensure that the drain hose is properly installed, with the end positioned at the correct height and secured in place.
- Inspect the drain pump for any debris or damage. Clean or replace the pump if necessary.
- Verify that the washer is not overloaded, as this can lead to drainage issues.
- If the error code OE persists, contact customer support for further assistance.
19. Dryer Not Tumbling
Description: The dryer drum does not tumble or rotate during the drying cycle.
Cause: The drive belt, motor, or roller assembly may be worn out or malfunctioning.
Troubleshooting:
- Check the drive belt for any signs of damage or wear. Replace it if necessary.
- Inspect the motor and roller assembly for any visible issues. Lubricate or replace components as needed.
- Ensure that the dryer drum is not overloaded, as excessive weight can prevent proper tumbling.
- Verify that the dryer door is securely closed, as the door switch needs to be engaged for the drum to rotate.
- Run a test cycle to see if the tumbling problem is resolved.
20. Washer Displaying Error Code LE (Motor Issue)
Description: The washer shows error code LE, indicating a problem with the motor.
Cause: There may be an issue with the motor, motor control board, or wiring connections.
Troubleshooting:
- Turn off the washer and unplug it from the power source for a few minutes. Then plug it back in and restart.
- Check the motor and control board for any visible signs of damage or loose connections. Repair or replace components as needed.
- Inspect the wiring connections between the motor and control board. Ensure they are secure and properly connected.
- If the problem persists, contact customer support or a professional technician for further diagnosis and assistance.
21. Washer Displaying Error Code PE (Water Level Sensor Issue)
Description: The washer displays error code PE, indicating a problem with the water level sensor.
Cause: There may be an issue with the water level sensor or its wiring connections.
Troubleshooting:
- Turn off the washer and unplug it from the power source for a few minutes. Then plug it back in and restart.
- Inspect the water level sensor and its wiring connections for any visible damage or loose connections. Repair or replace components as needed.
- Ensure that the water supply is properly connected and providing adequate water pressure.
- Check that the washer is not overloaded, as excessive weight can affect the water level sensor’s operation.
- If the error code PE persists, contact customer support or a professional technician for further assistance.
22. Dryer Not Heating Enough
Description: The dryer runs, but it does not produce enough heat to effectively dry the clothes.
Cause: The heating element, thermostat, or thermal fuse may be faulty or worn out.
Troubleshooting:
- Check the heating element for any signs of damage or breakage. Replace it if necessary.
- Inspect the thermostat and thermal fuse for continuity using a multimeter. Replace any components that are defective.
- Clean the dryer vent and exhaust duct to ensure proper airflow and ventilation.
- Adjust the drying settings and cycle options to a higher heat level, if available.
- If the issue persists, consider contacting customer support or a professional technician for further inspection.
23. Washer Door Seal Leaking
Description: Water leaks from the door seal area of the washer during operation.
Cause: The door seal may be damaged, worn out, or improperly installed.
Troubleshooting:
- Inspect the door seal for any visible signs of damage or wear. Replace it if necessary.
- Ensure that the door seal is properly aligned and seated in its designated groove.
- Clean the door seal regularly to remove any debris or residue that may affect the seal.
- Check that the washer door is closing securely and not being obstructed by any objects.
- If the leaking persists, consider contacting customer support or a professional technician for further assistance.
24. Dryer Producing Strange Odors
Description: The dryer emits unusual or unpleasant odors during operation.
Cause: There may be accumulated lint, debris, or foreign objects inside the dryer causing the odors.
Troubleshooting:
- Clean the lint trap and remove any lint or debris that has accumulated inside it.
- Inspect the dryer drum and remove any foreign objects that may be causing the odors.
- Clean the dryer vent and exhaust duct to ensure proper airflow and ventilation.
- Run a few cycles with no clothes to allow the dryer to burn off any remaining odors.
- If the strange odors persist, consider contacting customer support or a professional technician for further inspection.
25. Washer Not Starting
Description: The washer does not start or respond when the start button is pressed.
Cause: There may be a problem with the power supply, control board, or door switch.
Troubleshooting:
- Check that the washer is properly plugged into a functioning power outlet.
- Inspect the control board for any visible signs of damage or loose connections. Repair or replace it if necessary.
- Ensure that the door is securely closed and the door switch is making proper contact.
- Reset the washer by unplugging it from the power source for a few minutes, then plug it back in.
- If the washer still does not start, contact customer support or a professional technician for further assistance.
LG WKGX201HRA Washing Machine User Reviews
Positive Reviews from LG WKGX201HRA Washing Machine Users
Based on various user reviews available online, here are some positive experiences associated with the LG WKGX201HRA Washing Machine:
- Efficient Cleaning: Some users were satisfied with the washer’s cleaning performance, mentioning that it effectively removes stains and dirt from their clothes.
- Large Capacity: Users appreciated the spacious drum capacity of the LG WKGX201HRA, allowing them to wash larger loads of laundry at once.
- Smart Features: Several users praised the smart features and built-in intelligence of the washer, enabling convenient control and customization options through a mobile app.
- Energy Efficiency: Users highlighted the energy efficiency of the LG WKGX201HRA, mentioning reduced energy consumption and potential savings on utility bills.
- Stylish Design: Some users liked the sleek and modern design of the washer, adding an aesthetic appeal to their laundry room.
These positive reviews indicate that many customers have had a satisfactory experience with the LG WKGX201HRA Washing Machine.
Negative User Reviews of the LG WKGX201HRA Washing Machine
However, there were also some negative experiences reported by users of the LG WKGX201HRA Washing Machine:
- Technical Issues: Some users encountered technical problems such as error codes, sensor issues, or malfunctions with the washer and dryer components.
- Build Quality: A few users expressed concerns about the build quality of the LG WKGX201HRA, mentioning issues like dents, noisy operation, and perceived fragility.
- Delivery and Installation: Several users reported dissatisfaction with the delivery and installation process, citing delays, damaged units, or issues with incorrect accessories.
- Customer Service: Some users expressed frustration with customer service experiences, including difficulties in getting timely assistance or resolving issues.
- Compatibility with Front Loaders: A few users who had previous negative experiences with front loader washers expressed similar concerns with the LG WKGX201HRA.
These negative reviews highlight specific areas where users have encountered problems or challenges with the LG WKGX201HRA Washing Machine.
All user review information is sourced from Walmart.com.
Overall, while there were some negative experiences, the majority of users were satisfied with the LG WKGX201HRA Washing Machine, praising its efficient cleaning, large capacity, smart features, energy efficiency, and stylish design.
LG WKGX201HRA Common Problems and Troubleshooting
LG WKG101HWA Common Problems and Troubleshooting
LG WKGX201HBA Common Problems and Troubleshooting
LG WKGX201HRA Washing Machine Manual
The operating instructions for the LG WKGX201HRA Washing Machine can be found on the manufacturer’s website. Please visit the official LG website and navigate to the support or product page for the LG WKGX201HRA model to access the manual.
Frequently Asked Questions
- Q: Why is my LG WKGX201HRA not starting?
A: If your LG WKGX201HRA is not starting, ensure that the power cord is properly plugged into a working electrical outlet. Check if there is power supply to the outlet by testing it with another device. Additionally, make sure the washer’s door is securely closed and the control settings are properly selected. If the issue persists, consult the user manual or contact customer service for further assistance.
- Q: Why is my LG WKGX201HRA making loud noises during operation?
A: Loud noises during operation can be caused by various factors. First, check if the washer is overloaded with laundry, as this can strain the motor and result in excessive noise. Ensure that the machine is properly leveled on the floor, as an uneven surface can lead to vibrations and noise. Additionally, inspect the washer for any loose objects or foreign items that may be causing the noise. If the problem continues, consider contacting customer service for troubleshooting or repair options.
- Q: How can I resolve an error code displayed on my LG WKGX201HRA?
A: Error codes on the LG WKGX201HRA indicate specific issues with the machine. Consult the user manual or the manufacturer’s website for a list of error codes and their corresponding troubleshooting steps. Common error codes may involve issues with water supply, drainage, or sensor malfunctions. Follow the recommended troubleshooting steps provided in the manual to address the specific error code displayed on your LG WKGX201HRA.
Conclusion
In case of any problems with your LG WKGX201HRA Washing Machine, it is recommended to refer to the user manual, contact customer service, or seek assistance from an authorized service center. These resources can provide specific guidance and support tailored to your machine’s issues. Always prioritize safety and follow the manufacturer’s instructions for troubleshooting and maintenance.