Samsung NX60T811SG Gas Range Common Problems and Troubleshooting
In this article, we will address common problems and provide troubleshooting solutions specific to the Samsung NX60T811SG Gas Range. If you own this model, you’ll find valuable insights on resolving issues and ensuring optimal performance.
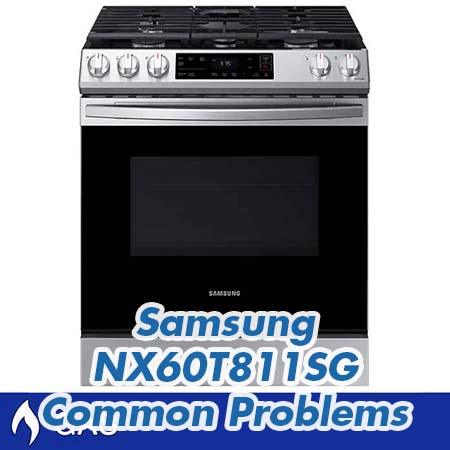
Samsung NX60T811SG Gas Range Overview
The Samsung NX60T811SG Gas Range is a versatile kitchen appliance designed to enhance your cooking experience. Here are some key features and product details:
| Product Details | Specification |
|---|---|
| Brand | Samsung |
| Compatible with | Google Assistant |
| Connectivity | Wi-Fi Enabled |
| Cooktop Style | Gas |
| Cooktop Surface Type | Grate |
| Dimensions: W x D x H | 29.94 in. x 28.69 in. x 36.25 in. |
| Features | Smart |
| Fit Width | 30 Inch |
| Model | NX60T811SG |
| Number of Burners | 5 |
| Oven Capacity | 6 cu. ft. |
| Oven Cleaning Options | Self Cleaning |
| Oven Configuration | Single Oven |
| Oven Interior Dimensions: W x D x H | 24.81 in. x 19.63 in. x 21.63 in. |
| Power Source | Gas |
| Range Type | Slide-In |
| Weight | 200 lb. |
Causes of Common Problems with the Samsung NX60T811SG Gas Range
In this section, we will delve into the various common problems that users may encounter with the Samsung NX60T811SG Gas Range and provide effective troubleshooting solutions to resolve these issues.
Common Problems with the Samsung NX60T811SG Gas Range
1. Uneven Heating in the Oven
Description: Some users experience uneven heating in the oven, resulting in unevenly cooked dishes.
Cause: This problem can occur due to a malfunctioning heating element or improper placement of the oven racks.
Troubleshooting:
- Ensure that the oven racks are positioned correctly. Use the recommended rack positions for the type of dish you’re cooking.
- Inspect the heating element for any visible damage or signs of wear. If found, replace the heating element.
- Preheat the oven for the recommended time before placing your dish inside to ensure even heating.
2. Gas Burner Ignition Issues
Description: Some users may encounter difficulties in igniting the gas burners.
Cause: Ignition problems can be caused by dirty burner ports, a faulty igniter, or gas supply issues.
Troubleshooting:
- Clean the burner ports thoroughly to remove any debris or blockages that may be preventing ignition.
- If the igniter is not clicking or sparking, it may need replacement. Consult the user manual for instructions on how to replace the igniter.
- Check the gas supply to ensure it is properly connected and that there are no interruptions in the gas flow.
3. Oven Not Reaching Desired Temperature
Description: Some users find that their Samsung NX60T811SG Gas Range oven does not reach the desired cooking temperature.
Cause: This issue can be attributed to a faulty temperature sensor, a malfunctioning thermostat, or calibration errors.
Troubleshooting:
- Verify that you are using the appropriate cooking settings and temperature for your recipe.
- If you suspect a calibration error, refer to the user manual for instructions on how to calibrate the oven temperature.
- If the problem persists, it may be necessary to replace the temperature sensor or thermostat. Consult a technician or Samsung’s customer support for assistance.
4. Gas Odor during Oven Operation
Description: Some users notice the presence of a gas odor when the oven is in operation.
Cause: A gas odor can indicate a gas leak or incomplete combustion in the oven.
Troubleshooting:
- If you detect a strong gas odor, immediately turn off the oven, open windows for ventilation, and shut off the gas supply to the appliance.
- Contact a qualified technician to inspect for gas leaks and perform necessary repairs.
- Ensure the oven’s burners are clean and free from debris, as incomplete combustion can produce a faint gas smell.
5. Oven Door Not Closing Properly
Description: Some users face issues with the oven door not closing securely, affecting cooking performance.
Cause: This problem may occur due to misaligned door hinges or a damaged door gasket.
Troubleshooting:
- Inspect the oven door gasket for any visible damage or wear. If it is damaged, replace the gasket to ensure a proper seal.
- Check the alignment of the door hinges. If they are misaligned, adjust them according to the user manual’s instructions.
- Make sure there are no obstructions preventing the door from closing completely, such as food debris or cookware.
6. Gas Burner Flames are Uneven
Description: Users may notice that the flames on the gas burners are uneven, which can affect cooking performance.
Cause: Uneven flames can be caused by clogged burner ports, gas pressure issues, or burner component damage.
Troubleshooting:
- Clean the burner ports thoroughly to remove any debris or blockages that may be causing uneven flames.
- Check the gas pressure to ensure it is within the recommended range. Adjust the pressure if necessary.
- If cleaning and pressure adjustments don’t resolve the issue, consider replacing the affected burner components.
7. Oven Display Not Functioning
Description: Some users may encounter issues where the oven display is not functioning, making it challenging to operate the appliance.
Cause: Display problems can result from electrical issues, a faulty control panel, or damaged wiring.
Troubleshooting:
- Ensure that the appliance is properly plugged into a functioning electrical outlet. Check for any tripped circuit breakers or blown fuses.
- If the display remains unresponsive, consult the user manual for instructions on resetting the control panel.
- If the problem persists, it may be necessary to replace the control panel or seek professional repair assistance.
8. Excessive Smoke During Broiling
Description: Users may experience excessive smoke when broiling food in the oven, leading to unpleasant cooking experiences.
Cause: Excessive smoke can be caused by dripping grease or food particles on the broiler element or oven bottom.
Troubleshooting:
- Regularly clean the oven’s interior, especially the area around the broiler element, to prevent the buildup of grease and food residue.
- Place a drip pan or aluminum foil on the oven rack below the food when broiling to catch any drippings and reduce smoke.
- Ensure that the broiler element is functioning correctly and not damaged.
9. Self-Cleaning Cycle Not Effective
Description: Users may find that the self-cleaning cycle of the oven does not effectively remove baked-on grease and food stains.
Cause: Ineffective self-cleaning can occur if the oven is heavily soiled or if the cycle duration is insufficient.
Troubleshooting:
- Before running the self-cleaning cycle, manually remove large food particles and excess grease from the oven interior.
- Ensure you are using the correct self-cleaning cycle duration as per the user manual’s recommendations.
- If the problem persists, consider running an additional self-cleaning cycle or spot-cleaning stubborn stains after the cycle.
10. Oven Door Glass Fogging Up
Description: Users may notice the oven door glass fogging up during cooking, obstructing visibility.
Cause: This issue can occur due to variations in temperature and humidity inside the oven.
Troubleshooting:
- Allow the oven door to remain closed during cooking to maintain a consistent temperature and reduce condensation on the glass.
- If fogging remains problematic, consider using a small fan or opening a nearby window to improve ventilation and reduce humidity in the kitchen.
11. Oven Takes Too Long to Preheat
Description: Users may experience extended preheating times for the oven, delaying meal preparation.
Cause: Slow preheating can result from a malfunctioning heating element, a faulty temperature sensor, or calibration issues.
Troubleshooting:
- Ensure that the oven is empty and that there are no obstructions in the oven cavity that could affect preheating.
- If preheating remains slow, inspect the heating element for damage or wear and replace it if necessary.
- Consider calibrating the oven temperature settings according to the user manual to improve preheating efficiency.
12. Gas Range Knobs are Difficult to Turn
Description: Some users may find it challenging to turn the gas range knobs, making it difficult to adjust the flame or temperature settings.
Cause: Knob stiffness can occur due to dirt buildup, grease accumulation, or internal component issues.
Troubleshooting:
- Remove the knobs and clean them thoroughly to remove any dirt or grease that may be hindering smooth rotation.
- Inspect the knob shafts and the internal components for any obstructions or damage. Lubricate or replace as needed.
- Exercise caution when handling the knobs to avoid damage or breakage during cleaning and maintenance.
13. Oven Fan Making Loud Noises
Description: Users may notice that the oven fan produces loud or unusual noises during operation.
Cause: Noisy oven fans can result from debris accumulation, damaged fan blades, or motor issues.
Troubleshooting:
- Inspect the oven fan for any visible debris or foreign objects that may be causing the noise. Remove obstructions carefully.
- If the noise persists, examine the fan blades for damage or warping. Replace damaged blades to reduce noise.
- If neither cleaning nor blade replacement resolves the issue, consult a technician for a motor inspection or replacement.
14. Gas Odor When Oven is Off
Description: Users may detect a gas odor even when the oven is turned off, indicating a potential gas leak.
Cause: A persistent gas odor when the oven is off can signal a gas leak in the appliance’s gas supply line or connections.
Troubleshooting:
- If you smell gas when the oven is off, immediately shut off the gas supply to the appliance and open windows for ventilation.
- Refrain from using the oven until a qualified technician can inspect the gas lines, connections, and safety valves for leaks.
- Do not attempt to repair gas-related issues yourself; always seek professional assistance to ensure safety.
15. Uneven Flame on Gas Burners
Description: Users may observe uneven flames on the gas burners, affecting cooking consistency.
Cause: Uneven flames can be caused by clogged burner ports, gas pressure variations, or burner component damage.
Troubleshooting:
- Clean the burner ports meticulously to remove any blockages or debris that may be causing flame irregularities.
- Check and adjust the gas pressure if necessary to ensure a consistent flame pattern across all burners.
- If cleaning and gas pressure adjustments do not resolve the issue, consider replacing the affected burner components.
16. Oven Door Won’t Close Securely
Description: Users may encounter difficulties in securely closing the oven door, affecting cooking performance and safety.
Cause: This issue can be attributed to misaligned door hinges, a damaged door latch, or worn-out gaskets.
Troubleshooting:
- Check for any obstructions or debris along the door’s sealing area that may prevent it from closing properly. Clear any obstacles.
- Inspect the door gasket for signs of wear or damage. Replace the gasket if it is no longer sealing the door effectively.
- If the problem persists, adjust the door hinges according to the user manual’s instructions to ensure a proper seal.
17. Oven Temperature Fluctuations
Description: Users may notice fluctuations in the oven’s temperature, leading to uneven cooking results.
Cause: Temperature variations can occur due to a faulty thermostat, calibration issues, or improper use.
Troubleshooting:
- Ensure that you are preheating the oven for the recommended time before placing your dish inside to stabilize the temperature.
- If you suspect calibration issues, refer to the user manual for instructions on how to recalibrate the oven temperature settings.
- If temperature fluctuations persist, it may be necessary to replace the thermostat or seek professional assistance.
18. Oven Light Bulb Needs Replacement
Description: The oven’s interior light bulb may burn out over time, requiring replacement for proper visibility.
Cause: The light bulb has reached the end of its lifespan or has become damaged.
Troubleshooting:
- Turn off the oven and let it cool completely before attempting to replace the light bulb.
- Consult the user manual to identify the correct replacement bulb type and wattage.
- Carefully replace the old bulb with a new one, ensuring it is securely screwed in place to restore proper lighting.
19. Cooktop Igniters Keep Clicking
Description: Users may experience a continuous clicking sound from the cooktop igniters, even after the burner is lit.
Cause: Persistent clicking can occur due to moisture or debris around the igniter or a faulty igniter switch.
Troubleshooting:
- Ensure that the burner area is completely dry and free from spills or moisture that could trigger the igniter.
- If clicking continues, check for any visible debris around the igniter and clean it carefully to prevent misfires.
- If cleaning does not resolve the issue, the igniter switch may need replacement. Consult the user manual for guidance.
20. Oven Door Glass Becomes Cloudy
Description: Users may notice the oven door glass becoming cloudy or stained over time, affecting visibility.
Cause: Cloudiness can result from the accumulation of grease and food residue on the inner and outer glass surfaces.
Troubleshooting:
- Remove the oven door following the instructions in the user manual to access both sides of the glass.
- Thoroughly clean the inner and outer glass surfaces using a suitable oven glass cleaner and a non-abrasive cloth.
- Reassemble the oven door and ensure it is securely attached to restore clear visibility.
21. Cooktop Burner Flames Turn Yellow
Description: Users may notice that the flames on the cooktop burners turn yellow instead of a blue flame, indicating a combustion issue.
Cause: Yellow flames can be caused by inadequate air supply, clogged burner ports, or gas pressure problems.
Troubleshooting:
- Check for any obstructions in the burner ports and clean them thoroughly to ensure proper airflow.
- Ensure that the air vents around the burners are not blocked, allowing sufficient oxygen for combustion.
- If the issue persists, consult a technician to check and adjust the gas pressure to achieve the correct flame color.
22. Oven Fan Runs Continuously
Description: Users may observe that the oven’s fan continues to run even after cooking is complete, which can be inconvenient.
Cause: This issue may occur due to a faulty fan motor, a malfunctioning thermostat, or sensor errors.
Troubleshooting:
- Check the oven’s settings to ensure it is turned off and not in a cooling or venting mode, which may require continuous fan operation.
- If the fan remains on unnecessarily, consult the user manual for instructions on resetting the thermostat or sensor settings.
- If the problem persists, it may be necessary to replace the fan motor or seek professional assistance.
23. Gas Range Knobs Not Aligned
Description: Users may find that the gas range knobs are not aligned properly with the burner settings, making it challenging to control the heat.
Cause: Knob misalignment can occur due to wear and tear, incorrect installation, or loose components.
Troubleshooting:
- Turn off the gas range and ensure that all knobs are in the “OFF” position.
- Inspect the knobs and their shafts for any signs of wear or damage. Replace any faulty components.
- If the knobs are simply misaligned, carefully realign them with the correct burner settings according to the user manual.
24. Oven Door Seal Appears Loose
Description: Users may notice that the oven door seal looks loose or detached, potentially impacting heat retention.
Cause: A loose door seal can result from wear, improper cleaning, or accidental damage.
Troubleshooting:
- Examine the door seal carefully to determine if it is simply out of place or if it needs replacement.
- If the seal is only misaligned, gently reposition it within the seal groove around the oven door.
- If the seal is damaged or excessively loose, consider replacing it with a new one to ensure a proper seal.
25. Cooktop Grates Showing Signs of Rust
Description: Users may notice rust developing on the cooktop grates, potentially affecting their appearance and safety.
Cause: Rust can form on grates due to exposure to moisture, corrosive substances, or lack of proper maintenance.
Troubleshooting:
- Remove the grates from the cooktop and clean them thoroughly, removing any rust and residue with a wire brush or steel wool.
- After cleaning, apply a thin coat of high-temperature paint or oil to protect the grates from further rust formation.
- Regularly wipe down the grates after use and store them in a dry place to prevent future rusting.
Samsung NX60T811SG Gas Range User Reviews
Positive Reviews from Samsung NX60T811SG Gas Range Users
Many users have expressed satisfaction with the Samsung NX60T811SG Gas Range. Here are some of the positive aspects that users have highlighted:
- As far as cooking and baking performance goes, this is a 5-star range. Users have found it to perform exceptionally well in the kitchen, even comparing it favorably to more expensive brands like Bosch.
- The large oven capacity has been appreciated by users, allowing them to cook multiple meals simultaneously.
- Users have praised the range for its stylish and minimalist design, contributing to the overall aesthetics of their kitchens.
- Quick preheating has been a standout feature, with users mentioning that the oven heats up rapidly.
- Many users have found the range easy to use and have appreciated its locking display feature to prevent accidental button presses.
Overall, these positive reviews highlight the cooking performance, design, and convenience of the Samsung NX60T811SG Gas Range.
Negative User Reviews of the Samsung NX60T811SG Gas Range
While there have been positive experiences, some users have encountered issues with the Samsung NX60T811SG Gas Range. Here are some of the problems that users have reported:
- Some users have experienced control panel freezes, where the touchpad becomes unresponsive and requires unplugging or resetting the circuit breaker to resolve. This issue has been a source of frustration for some.
- Several users have noted that the oven does not consistently maintain the set temperature, leading to uneven cooking results.
- The design of the grates on top of the range has received criticism, as they are perceived as too large and not suitable for smaller pots and pans.
- Issues with the durability of certain components, such as knobs breaking, have been reported by users.
- Some users have mentioned delivery and installation issues, including missing parts and difficulties in resolving these issues.
Despite these negative experiences, it’s important to note that not all users have encountered these problems, and individual experiences may vary.
Overall, when looking at user reviews from Costco, the majority of users appear to be satisfied with the Samsung NX60T811SG Gas Range. While there have been some negative experiences, particularly related to control panel issues and delivery problems, positive feedback highlights its cooking performance, design, and features.
Samsung NX60T811SG Gas Range Manual
You can find the operating instructions for the Samsung NX60T811SG Gas Range on the official Samsung website. Please visit https://www.samsung.com to access the comprehensive user manual, which provides detailed guidance on using and maintaining your gas range.
3 Samsung NX60T811SG Gas Range Frequently Asked Questions
1. How do I troubleshoot uneven cooking results in the oven?
If you’re experiencing uneven cooking results in your Samsung NX60T811SG Gas Range, consider the following steps:
- Ensure that you’re properly preheating the oven for the recommended time to stabilize the temperature.
- Use an oven thermometer to verify the actual temperature inside the oven matches the set temperature.
- Rotate your baking sheets or pans halfway through cooking to promote even browning and cooking.
- If the issue persists, consult the user manual for calibration instructions or consider contacting customer service for assistance.
2. What should I do if the control panel becomes unresponsive?
If the control panel on your Samsung NX60T811SG Gas Range becomes unresponsive, follow these steps:
- First, try resetting the control panel by unplugging the range or flipping the circuit breaker off and on.
- If the issue persists, check for any visible damage or loose connections on the control panel components.
- Refer to the user manual for troubleshooting guidance specific to control panel issues.
- If the problem continues, contact Samsung customer service or a service center for further assistance.
3. Can I use smaller pots and pans with the large grates on the cooktop?
The large grates on the cooktop of the Samsung NX60T811SG Gas Range can accommodate smaller pots and pans, but it may be less supportive due to the larger spacing. To address this:
- Ensure that your smaller cookware is stable on the grates and doesn’t wobble.
- If needed, you can use a heat diffuser or trivet to provide better support for smaller pots and pans.
- Exercise caution when cooking with smaller cookware to prevent accidents.
Conclusion
For any issues or problems with your Samsung NX60T811SG Gas Range, it’s recommended to refer to the user manual, contact customer service, or reach out to an authorized service center for assistance. These resources can provide valuable guidance and support to resolve any concerns you may have with your gas range.
Samsung NX60A6711ST Common Problems and Troubleshooting