NXR PRD3651 Gas Range Common Problems and Troubleshooting
Welcome to our guide on troubleshooting common problems with the NXR PRD3651 Gas Range. If you own a ModelX of this versatile gas range, you’ll find this article tailored to your specific appliance. We’ll explore some of the typical issues you might encounter and provide solutions to get your NXR PRD3651 back in perfect working order.
NXR PRD3651 Gas Range Overview
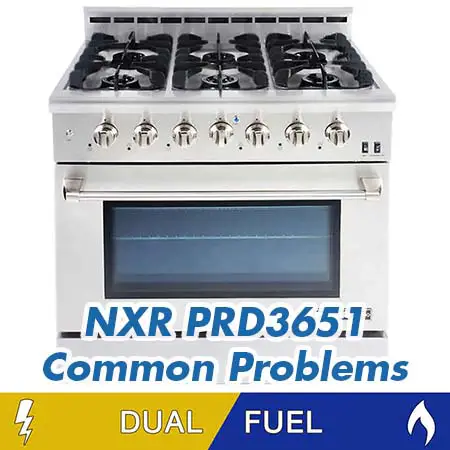
The NXR PRD3651 is a 36-inch professional-style DUAL FUEL range designed to meet your cooking needs with precision and style. Here are some key product details and features:
| Brand | NXR |
|---|---|
| Color | Stainless Steel |
| Compatible with | – |
| Connectivity | – |
| Cooktop Style | Gas |
| Cooktop Surface Type | Grate |
| Dimensions: W x D x H | 36 in. x 27.5 in. x 40.2 in. |
| Fit Width | 36 Inch |
| Model | PRD3651 |
| Number of Burners | 6 |
| Power Source | Dual Fuel |
| Weight | 277 lb. |
Causes of Common Problems with the NXR PRD3651 Gas Range
In the following section, we will delve into the common problems that users may encounter with the NXR PRD3651 Gas Range and provide effective troubleshooting solutions. Stay tuned to ensure your appliance continues to deliver outstanding performance.
Common Problems with the NXR PRD3651 Gas Range
1. Uneven Heating
Description: One common issue with the NXR PRD3651 Gas Range is uneven heating in the oven, leading to unevenly cooked dishes.
Cause: Uneven heating can occur due to a faulty bake or broil element, a malfunctioning temperature sensor, or a dirty oven.
Troubleshooting:
- Start by cleaning the oven thoroughly, including the racks and walls.
- If the problem persists, check the bake and broil elements for any visible damage or signs of malfunction.
- If the elements appear to be in good condition, test the temperature sensor with a multimeter to ensure it’s working correctly.
- Replace any faulty components as needed, and ensure the oven is properly calibrated.
2. Gas Burner Ignition Issues
Description: Some users may encounter problems with gas burner ignition, where burners fail to ignite when turned on.
Cause: Gas burner ignition issues can be caused by a dirty or clogged igniter, a faulty spark module, or gas supply problems.
Troubleshooting:
- Clean the igniter and burner ports to remove any dirt or debris that may obstruct ignition.
- If cleaning doesn’t resolve the issue, test the spark module by checking for visible damage or using a multimeter to check for continuity.
- Ensure there’s a proper gas supply to the range, and check for any gas line obstructions or leaks.
- If the problem persists, consider replacing the faulty components or seek professional assistance.
3. Oven Temperature Inaccuracy
Description: Users may notice that the oven’s temperature does not match the set temperature, leading to overcooking or undercooking of food.
Cause: Oven temperature inaccuracy can result from a faulty temperature sensor, a malfunctioning thermostat, or calibration issues.
Troubleshooting:
- Start by calibrating the oven temperature. Refer to the user manual for instructions on how to adjust the temperature settings.
- If calibration doesn’t resolve the issue, test the temperature sensor with a multimeter to ensure it’s functioning correctly.
- If the sensor checks out, inspect the thermostat for any signs of damage or malfunction and replace it if necessary.
- Perform test bakes to confirm that the issue is resolved and that the oven now maintains the correct temperature.
4. Oven Door Seal Leaks
Description: Some users may experience heat escaping from the oven due to a damaged or worn-out door seal, leading to energy inefficiency and longer cooking times.
Cause: Oven door seal leaks can occur when the seal is damaged, torn, or not properly seated.
Troubleshooting:
- Inspect the oven door seal for any visible damage or gaps.
- If the seal is damaged or not sealing properly, replace it with a new one designed for the NXR PRD3651 Gas Range.
- Ensure that the seal is correctly seated and forms a tight seal when the oven door is closed.
- Test the oven to confirm that heat is no longer escaping, and cooking times have improved.
5. Oven Self-Cleaning Malfunction
Description: Users may encounter issues with the oven’s self-cleaning function not working as expected, resulting in incomplete cleaning or error messages.
Cause: Self-cleaning malfunctions can be caused by a faulty door lock mechanism, a malfunctioning control board, or sensor issues.
Troubleshooting:
- Ensure that the oven door is securely closed and latched before starting the self-cleaning cycle.
- If the door doesn’t lock properly, inspect the door lock mechanism for damage and replace it if necessary.
- If the issue persists, check the control board and temperature sensors for any visible damage or errors.
- Reset the control board if needed and reattempt the self-cleaning cycle.
6. Gas Smell When Oven is On
Description: Some users may detect a gas smell when the oven is in use, which can be concerning and potentially hazardous.
Cause: Gas odors can result from a gas leak, a malfunctioning gas regulator, or improperly sealed gas connections.
Troubleshooting:
- If you smell gas, immediately turn off the oven and any nearby gas supply valves.
- Ventilate the area by opening windows and doors to disperse any accumulated gas.
- Inspect gas connections for leaks and tighten them if necessary.
- If you cannot identify or resolve the issue, contact a qualified technician to inspect and repair the gas system.
7. Oven Door Won’t Close Properly
Description: Some users may face difficulties with the oven door not closing securely, leading to heat loss and cooking inefficiencies.
Cause: The oven door not closing properly can result from a misaligned door hinge, damaged door gasket, or a faulty latch mechanism.
Troubleshooting:
- Examine the door gasket for any visible damage or deformation and replace it if necessary.
- Check the alignment of the door hinges and adjust them if the door is misaligned.
- If the latch mechanism is not engaging, inspect it for damage and replace any faulty components.
- Test the oven door to ensure it closes securely, forming a tight seal.
8. Burner Flames are Too High or Low
Description: Users may notice that the burner flames on the cooktop are either too high or too low, affecting cooking performance.
Cause: Incorrect burner flame height can be due to gas pressure issues, clogged burner ports, or burner cap misalignment.
Troubleshooting:
- If the flames are too high, reduce the gas supply pressure using the gas shut-off valve.
- If the flames are too low, ensure that the burner ports are clean and free of debris.
- Check the alignment of the burner caps to ensure they are correctly positioned over the burner ports.
- If the issue persists, contact a professional technician to inspect and adjust the gas supply and burners.
9. Oven Display or Controls Not Responding
Description: Users may encounter situations where the oven’s display or control panel becomes unresponsive, hindering the ability to operate the appliance.
Cause: Unresponsive controls can occur due to power supply issues, control board malfunctions, or loose wiring connections.
Troubleshooting:
- Check that the range is properly plugged into a functioning power outlet and that there are no tripped circuit breakers.
- If power is not the issue, inspect the control board for visible damage or loose wires.
- Reset the control board or perform a hard reset as per the user manual’s instructions.
- If the problem persists, consult a technician to diagnose and repair control board or wiring issues.
10. Oven Fan Making Excessive Noise
Description: Some users may experience an unusually loud or noisy oven fan during operation, which can be disruptive.
Cause: Noisy oven fans can be caused by debris caught in the fan blades, worn-out fan motors, or loose fan components.
Troubleshooting:
- Turn off the oven and ensure it is safely disconnected from power before investigating.
- Inspect the fan blades for any foreign objects or debris and remove them carefully.
- If the noise persists, inspect the fan motor for wear and replace it if necessary.
- Tighten any loose fan components and ensure they are securely fastened.
11. Oven Takes Too Long to Preheat
Description: Users may notice that the oven takes an extended period to reach the desired preheating temperature.
Cause: Slow preheating can be due to issues with the oven’s heating elements, temperature sensor, or calibration settings.
Troubleshooting:
- Check if the oven door is tightly closed, as a loose seal can lead to heat loss and prolonged preheating.
- If the door is not the issue, inspect the heating elements for signs of damage or malfunction and replace them if necessary.
- Verify that the temperature sensor is working correctly by testing it with a multimeter.
- Recalibrate the oven temperature settings as per the user manual’s instructions to improve preheating efficiency.
12. Gas Odor When Oven is Off
Description: Users may detect a gas smell even when the oven is turned off, which could indicate a gas leak.
Cause: A gas odor when the oven is off is often caused by a gas leak at the appliance’s connections or within the gas supply line.
Troubleshooting:
- If you smell gas when the oven is off, turn off the gas supply at the main valve immediately.
- Do not use any open flames, and ventilate the area by opening windows and doors.
- Inspect all gas connections, hoses, and fittings for visible leaks, and tighten them if necessary.
- Have a professional technician inspect and repair any gas leaks and ensure the oven is safe to use.
13. Oven Not Maintaining Temperature
Description: Users may observe that the oven cannot consistently maintain the set cooking temperature.
Cause: Inaccurate temperature control can result from a malfunctioning thermostat, temperature sensor, or control board.
Troubleshooting:
- Calibrate the oven’s temperature settings to ensure accuracy, following the user manual’s instructions.
- If calibration doesn’t resolve the issue, test the thermostat for accuracy and replace it if necessary.
- Check the temperature sensor with a multimeter to ensure it’s functioning correctly.
- If the problem persists, inspect the control board for any visible damage or errors and consider replacement.
14. Burner Igniters Keep Clicking
Description: Users may experience a continuous clicking sound from the burner igniters, even after the burner has ignited.
Cause: Persistent clicking can occur due to moisture or dirt in the igniter or issues with the spark module.
Troubleshooting:
- Clean the igniter and the area around it to remove any moisture or debris that may be causing the clicking.
- If cleaning doesn’t solve the issue, inspect the spark module for damage or malfunction and replace it if necessary.
- Ensure that the burners are completely dry before attempting to ignite them to prevent moisture-related clicking.
- If the problem continues, consult a technician to diagnose and address the clicking problem.
15. Oven Light Not Working
Description: Users may find that the oven light does not turn on, making it difficult to monitor the cooking process.
Cause: A non-functional oven light can result from a burnt-out light bulb, a faulty light socket, or a wiring issue.
Troubleshooting:
- Turn off the oven and let it cool before attempting to replace the light bulb.
- Replace the light bulb with a new one suitable for your NXR PRD3651 Gas Range.
- If the light still doesn’t work, inspect the light socket and wiring for damage or loose connections.
- Repair or replace any faulty components to restore the oven light functionality.
16. Oven Door Won’t Stay Closed
Description: Users may encounter issues where the oven door refuses to stay closed during cooking, leading to heat loss and safety concerns.
Cause: An oven door that won’t stay closed can result from worn-out hinges, a damaged latch, or a misaligned door seal.
Troubleshooting:
- Inspect the door hinges for wear and replace them if they are visibly damaged.
- Check the latch mechanism for any issues or damage, and replace any faulty components.
- Ensure that the door seal is properly aligned and sealing tightly when the door is closed.
- If the problem persists, consult a technician to diagnose and address the door closure issue.
17. Burner Flames Are Flickering
Description: Users may notice that the flames on the gas burners flicker or sputter while in use, affecting cooking performance.
Cause: Flickering burner flames can be due to clogged burner ports, improper gas pressure, or issues with the gas supply.
Troubleshooting:
- Clean the burner ports thoroughly to remove any debris or blockages that may be causing the flickering.
- Check the gas pressure and ensure it is within the recommended range for your NXR PRD3651 Gas Range.
- Inspect the gas supply line for any kinks or obstructions that may be affecting gas flow.
- If the issue persists, contact a professional technician to diagnose and address the flickering flames.
18. Oven Door Glass is Fogged or Stained
Description: Users may notice that the oven door’s glass becomes fogged, stained, or discolored over time, affecting visibility.
Cause: Fogged or stained oven door glass can result from cooking residue, spills, or moisture accumulation between the glass layers.
Troubleshooting:
- Allow the oven to cool completely before attempting to clean the glass.
- Remove any loose debris or spills from the glass surface using a soft brush or cloth.
- If the staining persists, remove the oven door and disassemble it to access the inner glass layers for thorough cleaning.
- Reassemble the oven door and ensure it is securely attached, providing clear visibility during cooking.
19. Oven Light Stays On or Flickers
Description: Users may encounter issues with the oven light staying on continuously or flickering during use.
Cause: Persistent oven light operation or flickering can be due to a faulty light switch, wiring problems, or a malfunctioning control board.
Troubleshooting:
- Turn off the oven and let it cool before investigating the light issue.
- Check the oven light switch for proper functioning and replace it if needed.
- Inspect the wiring connections around the light circuit for loose or damaged wires and repair as necessary.
- If the problem persists, examine the control board for issues or errors and consider replacement.
20. Oven Timer or Clock Resets Continuously
Description: Users may notice that the oven timer or clock continuously resets to incorrect settings or displays erratic behavior.
Cause: Continuous timer or clock resets can be caused by power fluctuations, a faulty control board, or loose wiring connections.
Troubleshooting:
- Check the power supply to the oven and ensure it is stable without frequent fluctuations.
- Inspect the control board for any visible damage or errors, and replace it if necessary.
- Examine the wiring connections related to the timer and clock functions, securing any loose connections.
- If the issue persists, consult a technician to diagnose and address the continuous resetting problem.
21. Gas Burners Won’t Light
Description: Users may face difficulties in igniting the gas burners, preventing them from using the cooktop.
Cause: Gas burner ignition issues can occur due to a faulty igniter, blocked burner ports, or gas supply problems.
Troubleshooting:
- Ensure the gas supply to the range is turned on, and there are no gas leaks in the vicinity.
- Clean the burner ports to remove any debris or blockages that may be obstructing gas flow.
- Inspect the igniter for visible damage or malfunction, and replace it if necessary.
- If the burners still won’t light, check for proper gas pressure and consult a technician if needed.
22. Oven Door Handle Loose
Description: Users may notice that the oven door handle becomes loose or wobbly, making it difficult to open and close the door.
Cause: A loose oven door handle can result from loose screws, worn-out handle components, or misalignment.
Troubleshooting:
- Turn off the oven and ensure it’s cool before attempting any repairs.
- Tighten the screws holding the handle in place to secure it to the door.
- If the handle remains loose, inspect the handle components for wear and replace them if needed.
- Ensure the handle is correctly aligned with the door, allowing for smooth operation.
23. Gas Smell Near Cooktop
Description: Users may detect a gas odor near the cooktop even when it’s not in use, indicating a potential gas leak.
Cause: A gas smell near the cooktop can result from gas line leaks, loose connections, or a malfunctioning gas valve.
Troubleshooting:
- If you smell gas, turn off the gas supply to the cooktop immediately and avoid open flames.
- Ventilate the area by opening windows and doors to disperse any accumulated gas.
- Inspect the gas connections and fittings for visible leaks and tighten them if necessary.
- Have a qualified technician inspect and repair the gas system to ensure safety.
24. Oven Not Reaching High Temperatures
Description: Users may find that the oven struggles to reach and maintain high temperatures, affecting cooking performance.
Cause: The oven’s inability to reach high temperatures can be due to faulty heating elements, a malfunctioning thermostat, or poor insulation.
Troubleshooting:
- Calibrate the oven’s temperature settings to ensure accuracy and set it to the desired high temperature.
- Inspect the heating elements for visible damage or malfunction and replace them if needed.
- Test the thermostat for accuracy and replace it if it’s not functioning correctly.
- Check the oven’s insulation for any gaps or damage that may be affecting temperature retention.
25. Uneven Flame on Gas Burners
Description: Users may observe uneven flame patterns on the gas burners, which can lead to uneven cooking results.
Cause: Uneven flames can result from clogged burner ports, misaligned burner caps, or gas pressure irregularities.
Troubleshooting:
- Clean the burner ports thoroughly to remove any blockages or debris that may be causing uneven flames.
- Check the alignment of the burner caps to ensure they are correctly positioned over the burner ports.
- Verify the gas pressure and ensure it is consistent with the manufacturer’s recommendations.
- If the issue persists, consult a technician to diagnose and address the uneven flame problem.
NXR PRD3651 Gas Range User Reviews
Positive Reviews from NXR PRD3651 Gas Range Users
- Some users were satisfied with the following parameters associated with their positive experience:
- This stove’s gas stove top and electric oven combination met their needs perfectly.
- They appreciated the option for both natural gas and propane, though the propane conversion kit had to be purchased separately.
- Despite minor issues, such as ignitors continuing to click after the burner is lit, they preferred this range over others they had previously owned, including a Viking dual fuel range.
- Users upgrading from a 30″ range to this 36″ range during a kitchen remodel found it to meet their requirements for multiple full-range burners, a dual-fuel option, and an enameled oven with true-glide oven shelves.
- Even though it arrived without an oven knob, NXR provided a prompt replacement.
- They appreciated the range’s functionality without unnecessary bells and whistles, like self-cleaning features.
- Positive remarks were made about features such as roller oven shelves that glide in and out and the concealed lower heating element.
- The blue LEDs over the knobs added a stylish touch.
- Overall, users expressed satisfaction with the quality, efficiency, design, and special features of this stove, recommending it for upgraded kitchens.
Negative User Reviews of the NXR PRD3651 Gas Range
- Some users were dissatisfied with the following problems associated with their negative experience:
- They faced issues with their brand-new stove and expressed frustration with the absence and unresponsiveness of Costco’s Concierge Services, which were supposed to assist with resolving such issues.
- Challenges included a lack of communication from the assigned concierge, unexplained case closures, and difficulties coordinating the return or exchange of the stove due to its weight and the absence of white glove service.
- Users reported issues with igniters continuously clicking, burners warping, and the oven not maintaining temperature. They also criticized NXR’s customer support.
- One user suggested researching reviews before making a purchase.
- Another user experienced two units of the same model failing within months of use.
- Several users expressed disappointment with their overall experience and advised caution when considering this product.
Overall, while some users faced challenges and expressed dissatisfaction with their NXR PRD3651 Gas Range experience, the majority of users were satisfied with the stove’s performance, functionality, and design.
NXR PRD3651 Gas Range Manual
The operating instructions for the NXR PRD3651 Gas Range can be found on the manufacturer’s website.
NXR PRD3651 Gas Range Frequently Asked Questions
1. How do I convert the NXR PRD3651 Gas Range from natural gas to propane?
To convert your NXR PRD3651 Gas Range from natural gas to propane, you will need to purchase the propane conversion kit from NXR. The kit includes the necessary components and instructions for the conversion. Here are the general steps:
- Turn off the gas supply to the range.
- Disconnect the range from the gas line.
- Follow the instructions provided in the conversion kit to replace the necessary orifices and make the required adjustments.
- After completing the conversion, carefully check for gas leaks and ensure that all connections are secure.
- Once everything is confirmed to be safe, you can turn on the gas supply and test the range with propane.
2. Why do the burner igniters keep clicking even after the burner is lit?
The continuous clicking of the burner igniters, even after the burner is lit, can be a common issue with gas ranges like the NXR PRD3651. This often happens because the burner housing can warp with the heat, causing the igniter to continue clicking. To address this issue, you can try sanding down the mating sides of the burner parts so that they meet on smooth surfaces. However, it’s recommended to contact NXR customer service or a qualified technician if the problem persists.
3. How can I troubleshoot uneven flame patterns on the gas burners?
If you notice uneven flame patterns on the gas burners of your NXR PRD3651 Gas Range, you can take the following steps to troubleshoot and potentially resolve the issue:
- Ensure that the burner caps are correctly positioned over the burner ports to allow for even gas distribution.
- Clean the burner ports thoroughly to remove any debris or blockages that may be obstructing gas flow.
- Check the gas pressure to ensure it is consistent with the manufacturer’s recommendations.
- If the problem persists, consult a technician to diagnose and address the issue, as it could be related to more complex internal components.
Conclusion
For any problems or concerns with your NXR PRD3651 Gas Range, it’s advisable to always refer to the manual for guidance. Additionally, don’t hesitate to reach out to customer service or a certified service center whenever possible for professional assistance and support.
NXR PRO3651D Common Problems and Troubleshooting