LG WKE100HVA Common Problems and Troubleshooting
Introduction
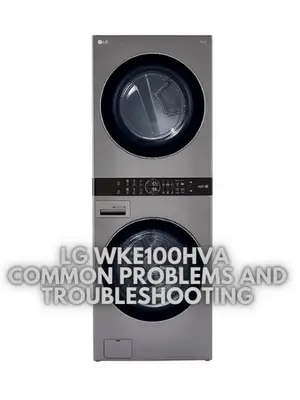
Full-size and fully featured, the LG WKE100HVA Washing Machine offers a convenient laundry solution with its innovative design. With the washer on the bottom and dryer on top, this sleek single unit LG WashTower provides ample space for additional features like a sink or folding table. The exclusive Center Control panel of LG’s WashTower is perfectly positioned with both washer and dryer controls at the ideal height, making laundry a breeze. This article aims to address common problems and provide troubleshooting tips for the LG WKE100HVA Washing Machine.
LG WKE100HVA Overview
The LG WKE100HVA is a powerful washing machine that combines convenience and efficiency. It offers an ultra-large capacity of 4.5 cu.ft. for the washer and 7.4 cu.ft. for the dryer. The single unit WashTower design provides full-size capacity and features, along with a centralized control panel for easy access. The built-in intelligence of this washing machine takes out the guesswork by utilizing AI technology to select optimal wash and dry motions and settings. Additionally, the ThinQ Care feature keeps your appliance running smoothly with maintenance notifications and early diagnosis right on your phone.
Product Details and Features
| Product Details | Features |
|---|---|
| Ultra large capacity 4.5 cu.ft. washer and 7.4 cu.ft. dryer (WashTower) | Get It All Done In Less Time. Ultra Large Capacity (4.5 cu. ft. in the washer and 7.4 cu. ft. in the dryer) means you have even more room to do laundry in fewer loads. |
| Single Unit WashTower design | This vertical laundry solution puts everything within reach. Full-size capacity and features with a centralized control panel for the easiest access ever. |
| Built-in intelligence | Built-in intelligence takes out the guesswork— AI technology can select optimal wash & dry motions and settings. Washer can auto-select a compatible drying cycle. |
| ThinQ Care | Keep your appliances running smoothly with ThinQ Care, now in the ThinQ app. Get notifications about usage, maintenance, plus early diagnosis right on your phone. ThinQ Care will help you understand your appliance needs, avoid potential problems, and keep your appliance running its best. |
| AAFA certified LG washer | AAFA certified LG washers with the Allergiene Cycle use the power of steam to remove over 95% of pet dander and dust. |
| Sensor Dry | With Sensor Dry, the dryer can detect moisture and automatically adjust drying time for loads of all sizes—saving energy with less wear and tear on clothes. |
| ThinQ Technology | Use the ThinQ app to start the laundry while you’re out, check remaining cycle time or get notifications on your smartphone. Go hands-free—select features work with Alexa and the Google Assistant. Never run out of detergent and dryer sheets again—Amazon Dash Replenishment Service tracks usage and automatically delivers your favorite detergent and dryer sheets right to your door. ThinQ Care offers preventative maintenance tips and alerts and expedited repairs, for enhanced satisfaction plus improved product performance. |
| Tempered glass doors with rose gold trim | LG front load washers and dryers are the first to use tempered glass doors for a sleek, stylish look that resists shock and scratches. Rose gold trims complement the doors and enhance the premium feel. |
| Direct Drive Motor 10-year limited warranty (washer) | Backed by a 10-year limited warranty, the LG Direct Drive Motor delivers peace of mind with every load. Fewer moving parts means less noise and vibration, greater stability and durable performance you can depend on for years to come. |
| ENERGY STAR Certified | High efficiency washer uses far less water and energy than a conventional washer for savings that add up with each load. Get additional savings with load-sensing technology that adjusts water levels and wash times or by adding the ColdWash option to almost any cycle. For drying, efficient sensor drying and low-heat settings save energy and money without sacrificing performance. |
| FlowSense Duct Clogging; Lint Filter Indicators (dryer) | With the FlowSense Duct Clogging and Clean Filter Indicators, you’ll know when it’s time to clean the ducts and the lint filter out to ensure great drying every time, lower utility bills and fewer service calls. |
| NeveRust Stainless Steel Tubs | Unlike tubs made from porcelain or plastic, the LG NeveRust Stainless Steel Tub avoids the chips and nicks that can snag fabrics and ruin clothing. Durable surface actually gets smoother over time and keeps your washer looking like new, even after years of use. |
| TubClean system (washer) | Thoroughly cleans and dries the tub, door, and gaskets with the press of a button. |
| TrueBalance anti-vibration system (washer) | Noisy, off-balance loads can disrupt your laundry routine—and your day. Wash in peace with the TrueBalance anti-vibration system that keeps even big loads in balance, reducing noise and vibration. A must-have for main- or second-floor laundry rooms. |
| LoDecibel Quiet Operation | Run the washer or dryer whenever you want, without interrupting naptime or your favorite show. The LG WashTower is designed for quiet operation, from the motor to the cabinet to individual components. |
| Wrinkle Care option (dryer) | Select the Wrinkle Care option before hitting start. The dryer will periodically tumble the load for up to 3 hours after the cycle is done or until the door is opened to help keep wrinkles at bay. |
| SpeedWash Cycle (washer) | Yes
|
Common Problems with the LG WKE100HVA and Troubleshooting
1. Washer Not Draining Properly
Description of the problem: The washer does not drain the water after a wash cycle.
Cause of the problem: There could be a blockage in the drain hose or pump, or a malfunctioning drain pump.
Troubleshooting step-by-step:
- Check the drain hose for any kinks or clogs. Straighten the hose if necessary.
- Inspect the drain pump filter and remove any debris or obstructions.
- Ensure that the drain pump itself is not damaged or faulty. If needed, replace the drain pump.
2. Dryer Not Heating
Description of the problem: The dryer does not produce heat during a drying cycle.
Cause of the problem: The heating element may be defective, or there could be an issue with the thermal fuse or thermostat.
Troubleshooting step-by-step:
- Check if the dryer is properly plugged into the power outlet.
- Inspect the heating element for any signs of damage or wear. Replace it if necessary.
- Test the thermal fuse and thermostat using a multimeter. Replace any components that show no continuity.
3. Washer Leaking Water
Description of the problem: Water is leaking from the washer during a wash cycle.
Cause of the problem: There may be a damaged door seal or gasket, a loose hose connection, or an issue with the water inlet valve.
Troubleshooting step-by-step:
- Inspect the door seal and gasket for any tears, cracks, or gaps. Replace if necessary.
- Check all hose connections to ensure they are tight and secure.
- Test the water inlet valve for any leaks or malfunctions. Replace if needed.
4. Dryer Takes Too Long to Dry Clothes
Description of the problem: The dryer cycle takes an unusually long time to fully dry the clothes.
Cause of the problem: There may be a clogged vent or exhaust duct, a faulty thermostat, or an issue with the moisture sensor.
Troubleshooting step-by-step:
- Clean the vent and exhaust duct to ensure proper airflow. Remove any lint or obstructions.
- Test the thermostat using a multimeter. Replace it if it does not function correctly.
- Check the moisture sensor for any debris or damage. Clean or replace if necessary.
5. Washer Display Error Codes
Description of the problem: The washer displays error codes on the control panel.
Cause of the problem: Error codes can indicate various issues, such as an unbalanced load, a malfunctioning sensor, or a problem with the control board.
Troubleshooting step-by-step:
- Refer to the user manual to identify the specific error code and its corresponding troubleshooting steps.
- If the error code indicates an unbalanced load, redistribute the clothes evenly in the drum and restart the cycle.
- If the error persists, check the relevant sensors and the control board for any faults. Replace components if necessary.
6. Washer Not Spinning
Description of the problem: The washer drum does not spin during a wash cycle.
Cause of the problem: This issue may be caused by a faulty motor, a broken belt, or an issue with the motor control board.
Troubleshooting step-by-step:
- Check if the washer is properly plugged into the power outlet.
- Inspect the drive belt for any signs of damage or wear. Replace it if necessary.
- Test the motor using a multimeter to determine if it is functioning correctly. Replace if needed.
7. Dryer Not Turning On
Description of the problem: The dryer does not power on when the start button is pressed.
Cause of the problem: There may be an issue with the power supply, a malfunctioning door switch, or a faulty control board.
Troubleshooting step-by-step:
- Check if the dryer is properly plugged into the power outlet and if the circuit breaker is not tripped.
- Inspect the door switch to ensure it is functioning correctly. Replace if necessary.
- Test the control board for any faults using a multimeter. Replace if it does not show proper functionality.
8. Washer Producing Excessive Noise
Description of the problem: The washer emits loud noises during operation, such as banging or grinding sounds.
Cause of the problem: This issue can be caused by an unbalanced load, worn-out drum bearings, or loose components.
Troubleshooting step-by-step:
- Ensure that the washer is leveled properly and the load is evenly distributed in the drum.
- Inspect the drum bearings for any signs of wear or damage. Replace if necessary.
- Tighten any loose components, such as screws or bolts, that may be causing the noise.
9. Dryer Not Tumbling
Description of the problem: The dryer drum does not tumble or rotate during a drying cycle.
Cause of the problem: There may be a broken drive belt, a malfunctioning motor, or an issue with the roller or idler assembly.
Troubleshooting step-by-step:
- Check the drive belt for any signs of damage or breakage. Replace it if necessary.
- Test the motor using a multimeter to determine if it is functioning correctly. Replace if needed.
- Inspect the roller and idler assembly for any faults. Replace components if required.
10. Washer Overflows with Water
Description of the problem: The washer fills with water excessively, causing it to overflow.
Cause of the problem: This issue can occur due to a malfunctioning water inlet valve, a faulty water level sensor, or a blocked pressure hose.
Troubleshooting step-by-step:
- Inspect the water inlet valve for any leaks or malfunctions. Replace if necessary.
- Check the water level sensor to ensure it is functioning properly. Replace if needed.
- Inspect the pressure hose for any blockages or kinks. Clear any obstructions.
11. Washer Not Dispensing Detergent
Description of the problem: The washer does not properly dispense detergent during a wash cycle.
Cause of the problem: This issue may be caused by a clogged detergent dispenser, a faulty dispenser valve, or an issue with the control board.
Troubleshooting step-by-step:
- Inspect the detergent dispenser for any blockages or residue buildup. Clean it thoroughly.
- Check the dispenser valve to ensure it is opening and closing properly. Replace if necessary.
- Test the control board to determine if it is sending the correct signals to the dispenser. Replace if it is faulty.
12. Dryer Overheating
Description of the problem: The dryer becomes excessively hot during operation.
Cause of the problem: This issue can occur due to a blocked vent or exhaust duct, a malfunctioning thermostat, or a faulty heating element.
Troubleshooting step-by-step:
- Check the vent and exhaust duct for any obstructions. Clear them to ensure proper airflow.
- Test the thermostat using a multimeter to determine if it is functioning correctly. Replace it if needed.
- Inspect the heating element for any signs of damage or defects. Replace if necessary.
13. Washer Shaking or Vibrating Excessively
Description of the problem: The washer shakes or vibrates excessively during a wash cycle.
Cause of the problem: This issue may be caused by an unbalanced load, uneven leveling, or worn-out shock absorbers.
Troubleshooting step-by-step:
- Ensure that the load inside the washer is distributed evenly. Rearrange items if necessary.
- Check if the washer is properly leveled. Adjust the leveling feet as needed.
- Inspect the shock absorbers for any signs of wear or damage. Replace if required.
14. Dryer Producing Unusual Odors
Description of the problem: The dryer emits strange or unpleasant odors during operation.
Cause of the problem: This issue can be caused by lint buildup, a clogged vent, or a malfunctioning heating element.
Troubleshooting step-by-step:
- Clean the lint filter thoroughly to remove any accumulated lint or debris.
- Inspect the vent and exhaust duct for any blockages. Clear them to ensure proper airflow.
- Check the heating element for any signs of damage or defects. Replace if necessary.
15. Washer Door Won’t Lock
Description of the problem: The washer door does not lock during a wash cycle.
Cause of the problem: This issue can occur due to a malfunctioning door latch or lock mechanism, or a faulty door switch.
Troubleshooting step-by-step:
- Inspect the door latch or lock mechanism for any signs of damage or defects. Replace if necessary.
- Test the door switch using a multimeter to determine if it is functioning correctly. Replace if needed.
- Ensure that there are no obstructions preventing the door from closing properly. Clear any obstacles if present.
16. Washer Not Spinning Clothes Dry Enough
Description of the problem: The washer does not spin clothes dry enough, leaving them damp.
Cause of the problem: This issue can be caused by an unbalanced load, a malfunctioning spin cycle, or a problem with the motor or drive belt.
Troubleshooting step-by-step:
- Ensure that the load inside the washer is distributed evenly. Rearrange items if necessary.
- Check if the spin cycle is functioning properly. If not, inspect the motor and drive belt for any faults. Replace if needed.
- Test the washer with a smaller load size to see if it spins the clothes drier. If the issue persists, there may be a problem with the washer’s internal mechanisms. Contact customer support for further assistance.
17. Dryer Not Turning Off at the End of a Cycle
Description of the problem: The dryer continues to run even after the designated cycle has ended.
Cause of the problem: This issue may be caused by a malfunctioning timer, a faulty thermostat, or a problem with the control board.
Troubleshooting step-by-step:
- Check the timer settings to ensure they are correctly set. Reset the timer if necessary.
- Test the thermostat using a multimeter to determine if it is functioning correctly. Replace if needed.
- Inspect the control board for any faults or malfunctions. If suspected, consider replacing the control board.
18. Washer Not Agitating
Description of the problem: The washer drum does not agitate or move during a wash cycle.
Cause of the problem: This issue can be caused by a broken agitator, a malfunctioning drive belt, or an issue with the motor.
Troubleshooting step-by-step:
- Inspect the agitator for any signs of damage or defects. Replace if necessary.
- Check the drive belt to ensure it is not broken or loose. Replace or adjust it if needed.
- Test the motor using a multimeter to determine if it is functioning correctly. Replace if necessary.
19. Dryer Not Shutting Off When the Door Opens
Description of the problem: The dryer continues to run even when the door is opened.
Cause of the problem: This issue can be caused by a faulty door switch or a problem with the control board.
Troubleshooting step-by-step:
- Inspect the door switch to ensure it is functioning properly. Replace if necessary.
- Check the control board for any faults or malfunctions. If suspected, consider replacing the control board.
- Ensure that there are no obstructions preventing the door from closing properly. Clear any obstacles if present.
20. Washer Not Starting
Description of the problem: The washer does not start or respond when the start button is pressed.
Cause of the problem: This issue can be caused by a faulty control board, a malfunctioning door switch, or a problem with the power supply.
Troubleshooting step-by-step:
- Check if the washer is properly plugged into the power outlet and if the circuit breaker is not tripped.
- Inspect the door switch to ensure it is functioning correctly. Replace if necessary.
- Test the control board using a multimeter to determine if it is sending the correct signals. Replace if it is faulty.
21. Washer Door Won’t Open
Description of the problem: The washer door remains locked and won’t open after completing a wash cycle.
Cause of the problem: This issue can be caused by a malfunctioning door latch, a faulty control board, or an error in the door lock mechanism.
Troubleshooting step-by-step:
- Ensure that the washer has completed the entire wash cycle. Some models have a delay before the door can be unlocked.
- Check the door latch for any signs of damage or defects. Replace if necessary.
- Reset the washer by unplugging it from the power outlet for a few minutes, then plugging it back in.
- If the issue persists, consult the user manual for specific instructions on manually unlocking the door or contact customer support for assistance.
22. Dryer Drum Not Turning
Description of the problem: The dryer drum does not rotate or turn during a drying cycle.
Cause of the problem: This issue can be caused by a broken drive belt, a faulty motor, or a malfunctioning roller or idler assembly.
Troubleshooting step-by-step:
- Inspect the drive belt to ensure it is not broken or loose. Replace or adjust it if needed.
- Test the motor using a multimeter to determine if it is functioning correctly. Replace if necessary.
- Inspect the roller and idler assembly for any faults. Replace components if required.
23. Washer Not Filling with Water
Description of the problem: The washer does not fill with water at the start of a wash cycle.
Cause of the problem: This issue can be caused by a clogged water inlet valve, a malfunctioning water level sensor, or an issue with the control board.
Troubleshooting step-by-step:
- Check the water supply to ensure it is turned on and providing adequate water pressure.
- Inspect the water inlet valve for any blockages or malfunctions. Clean or replace if necessary.
- Test the water level sensor using a multimeter to determine if it is functioning correctly. Replace if needed.
- Check the control board for any faults or malfunctions. If suspected, consider replacing the control board.
24. Dryer Not Drying Clothes Completely
Description of the problem: The dryer does not fully dry the clothes, leaving them damp or partially moist.
Cause of the problem: This issue can be caused by a clogged lint filter, a blocked vent or exhaust duct, or a faulty moisture sensor.
Troubleshooting step-by-step:
- Clean the lint filter thoroughly to remove any accumulated lint or debris.
- Inspect the vent and exhaust duct for any obstructions. Clear them to ensure proper airflow.
- Check the moisture sensor for any debris or damage. Clean or replace if necessary.
25. Washer Door Seal or Gasket Moldy
Description of the problem: The washer’s door seal or gasket develops mold or mildew buildup.
Cause of the problem: This issue can occur due to moisture retention, inadequate cleaning, or improper ventilation.
Troubleshooting step-by-step:
- Thoroughly clean the door seal or gasket using a mild detergent or specialized cleaning solution.
- Ensure that the area is properly ventilated to allow for adequate drying and air circulation.
- After each use, wipe down the door seal or gasket and leave the washer door slightly ajar to promote airflow and prevent moisture buildup.
LG WKE100HVA Washing Machine User Reviews
When considering purchasing a new washing machine, it’s essential to gather information from other users to understand their experiences. Here, we present a collection of user reviews for the LG WKE100HVA Washing Machine, sourced from Walmart. These reviews provide valuable insights into the positive and negative aspects of the product, helping you make an informed decision.
Positive Reviews from LG WKE100HVA Washing Machine Users
While reviewing the feedback from LG WKE100HVA Washing Machine users, we found that several users were satisfied with the following features and experiences:
- Efficient cleaning performance: Users appreciated the washing machine’s ability to clean clothes effectively, leaving them fresh and stain-free.
- Convenient size and design: The compact size of the LG WKE100HVA made it a perfect fit for various laundry spaces, providing users with the flexibility to install it in smaller areas.
- User-friendly controls: The intuitive control panel and easy-to-use interface received praise from users, allowing them to operate the machine with ease.
- Quiet operation: Many users highlighted the washing machine’s quiet performance, which made it convenient to run laundry even during quieter times of the day.
- Advanced features: Users were impressed with the advanced features, such as built-in Wi-Fi connectivity and the ability to control the machine through a smartphone app.
Based on these positive reviews, it is evident that the LG WKE100HVA Washing Machine has been successful in meeting the expectations of many users.
Negative User Reviews of the LG WKE100HVA Washing Machine
While the majority of users expressed satisfaction with the LG WKE100HVA Washing Machine, it’s important to consider the following negative aspects mentioned by some users:
- Delivery and installation issues: A few users reported problems with the delivery process and installation, such as damaged appliances or incomplete setups. It is advisable to carefully coordinate the delivery and installation to avoid any inconvenience.
- Drying performance: Some users expressed disappointment with the drying performance of the machine, stating that it did not adequately dry clothes in a single cycle. It is recommended to adjust the settings or seek assistance if experiencing similar issues.
- Technical malfunctions: A few users encountered technical malfunctions, such as the washer door not opening, drum not turning, or issues with the water filling or drainage. If faced with such problems, referring to the troubleshooting steps in the user manual or contacting customer support is recommended.
It’s important to note that negative experiences may vary from user to user, and the mentioned issues may not be widespread. However, it is crucial to consider both positive and negative feedback while making a purchase decision.
Overall, the majority of users expressed satisfaction with their LG WKE100HVA Washing Machine, highlighting its efficiency, quiet operation, and advanced features. However, it is recommended to thoroughly evaluate the specific needs and requirements of your household before making a final decision.
LG WKE100HVA Common Problems and Troubleshooting
LG WT7150CM Common Problems and Troubleshooting
LG WT7300CW Common Problems and Troubleshooting
LG WKE100HVA Washing Machine Manual
To access the operating instructions for the LG WKE100HVA Washing Machine, please visit the official website of the manufacturer. The manual provides detailed information on the setup, operation, maintenance, and troubleshooting of the washing machine, ensuring that you have all the necessary guidance to use it effectively.
Frequently Asked Questions
- Q: Why is my LG WKE100HVA Washing Machine not starting?
A: If your washing machine is not starting, make sure it is properly plugged into a functioning power outlet. Check if the power cord is securely connected to the machine. Additionally, ensure that the door is closed and latched correctly. If the issue persists, consult the user manual for specific troubleshooting steps or contact customer service for assistance.
- Q: Why is my LG WKE100HVA producing a strange odor?
A: If your washing machine is emitting an unusual odor, it may be due to several factors. First, check if there is any residue or buildup inside the drum or detergent dispenser. Clean these areas thoroughly using mild detergent and warm water. Additionally, run a cleaning cycle with an approved washing machine cleaner. This should help eliminate any unpleasant odors. If the problem continues, refer to the user manual or contact customer service.
- Q: Why is my LG WKE100HVA not draining water?
A: If your washing machine is not draining water, there could be a clog or blockage in the drain hose or pump filter. Inspect these components and remove any debris that may be obstructing the flow of water. It is also essential to ensure that the drain hose is properly connected and not kinked. If the issue persists, consult the user manual or seek assistance from customer service or a service center.
Conclusion
When encountering any problems with your LG WKE100HVA Washing Machine, it is always recommended to refer to the user manual provided by the manufacturer. The manual contains valuable troubleshooting information specific to your model. If the issue remains unresolved or if you have any further questions, don’t hesitate to contact customer service or a certified service center. They have the expertise to assist you in resolving any concerns and ensuring the optimal performance of your washing machine.