GE JB655SKSS Electric Range Common Problems and Troubleshooting
Welcome to our guide on common problems and troubleshooting for the GE JB655SKSS Electric Range. If you own this specific model, you know it offers a range of impressive features. However, like any appliance, it may encounter issues over time. In this article, we’ll explore the common problems associated with the GE JB655SKSS Electric Range and provide solutions to help you keep it running smoothly.
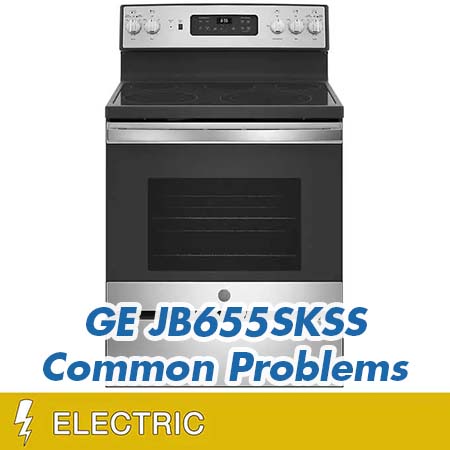
GE JB655SKSS Electric Range Overview
The GE JB655SKSS Electric Range is a versatile kitchen appliance designed to make your cooking experience more efficient and enjoyable. Here are some key product details and features:
| Brand | GE Appliances |
|---|---|
| Compatible with | – |
| Connectivity | – |
| Cooktop Style | Smoothtop |
| Dimensions: W x D x H | 29.88 in. x 28 in. x 47 in. |
| Fit Width | 30 Inch |
| Model | JB655SKSS |
| Number of Burners | 5 |
| Number of Oven Racks | 2 |
| Oven Capacity | 5.3 cu. ft. |
| Oven Configuration | Single Oven |
| Oven Cooking Process (Air Fry) | Yes |
| Oven Cooking Process (Convection) | Yes |
| Power Source | Electric |
| Range Type | Freestanding |
| Weight | 151 lb. |
Causes of Common Problems with the GE JB655SKSS Electric Range
In this section, we’ll delve into the common problems that can arise with the GE JB655SKSS Electric Range and provide solutions to address these issues.
Common Problems with the GE JB655SKSS Electric Range
1. Uneven Heating in the Oven
Description: Some users may experience uneven heating in the oven, leading to inconsistent cooking results.
Cause: Uneven heating can occur due to a variety of reasons, such as a faulty heating element, improper rack placement, or oven calibration issues.
Troubleshooting:
- Ensure that you place your cookware and food items on the correct oven rack position as recommended in the user manual.
- Check the oven’s heating element for any signs of damage or malfunction. If necessary, replace the heating element.
- If you suspect calibration issues, consult the user manual for instructions on how to recalibrate the oven temperature settings.
2. Cooktop Elements Not Heating
Description: Some cooktop elements may not heat up when turned on, making it impossible to cook efficiently.
Cause: This problem could be caused by a faulty burner element, a defective control switch, or a wiring issue.
Troubleshooting:
- Check if the cooktop element is properly seated in its socket. If loose, secure it properly.
- Inspect the control switch for the affected burner. If it’s damaged or unresponsive, consider replacing it.
- If neither of the above steps resolves the issue, it’s advisable to contact a qualified technician to examine the wiring and diagnose any electrical problems.
3. Oven Not Heating Up
Description: Your oven may fail to heat up, preventing you from cooking or baking.
Cause: The oven’s lack of heating can be due to a defective bake element, a malfunctioning thermostat, or a problem with the oven’s control board.
Troubleshooting:
- Check the bake element for visible signs of damage or burnout. Replace it if necessary.
- If the bake element appears to be in working order, test the thermostat for functionality. A faulty thermostat may need replacement.
- If both the bake element and thermostat seem fine, consult the user manual for instructions on resetting the oven’s control board or call for professional assistance.
4. Oven Door Not Closing Properly
Description: The oven door may not close securely, leading to heat loss and uneven cooking.
Cause: A misaligned door hinge, worn-out gasket, or debris obstructing the door seal can cause this problem.
Troubleshooting:
- Inspect the door seal/gasket for any visible damage or debris. Clean or replace it if necessary.
- Check the alignment of the door hinges. If they are misaligned, adjust them to ensure the door closes properly.
- Ensure there are no obstructions preventing the door from closing completely. Remove any foreign objects if found.
5. Oven Overheating
Description: The oven may excessively heat up beyond the set temperature, resulting in burnt or overcooked dishes.
Cause: Oven overheating can be caused by a malfunctioning thermostat, a defective temperature sensor, or a calibration issue.
Troubleshooting:
- Use an oven thermometer to verify the actual temperature inside the oven. If it’s significantly higher than the set temperature, the thermostat may need replacement.
- If the temperature sensor is suspected to be faulty, consider replacing it to ensure accurate temperature readings.
- If you suspect calibration issues, refer to the user manual for instructions on recalibrating the oven temperature settings.
6. Oven Display Not Functioning
Description: The digital display on the oven control panel may not work, making it difficult to set cooking times and temperatures.
Cause: A malfunctioning control board, loose wiring connections, or a power supply issue can lead to the display not functioning.
Troubleshooting:
- Check the power supply to the appliance. Ensure it’s properly plugged in and that there are no tripped circuit breakers or blown fuses.
- Inspect the wiring connections to the control board. Tighten any loose wires or replace damaged ones.
- If the issue persists, consider replacing the control board or seek professional assistance for further diagnosis.
7. Self-Cleaning Feature Not Working
Description: The self-cleaning feature of the oven may fail to operate, preventing you from easily cleaning the oven.
Cause: Problems with the door lock mechanism, a faulty temperature sensor, or a malfunctioning control board can affect the self-cleaning feature.
Troubleshooting:
- Check if the oven door is securely locked during the self-cleaning cycle. If not, the door lock mechanism may need adjustment or replacement.
- Test the temperature sensor to ensure it’s providing accurate readings. Replace it if it’s not functioning correctly.
- If neither of the above steps resolves the issue, consider replacing the control board or consult the user manual for further guidance.
8. Burnt or Uneven Stovetop Heating
Description: Some users may notice that the stovetop burners produce uneven heat or develop dark spots, affecting cooking performance.
Cause: Irregular heating can occur due to mineral deposits on the burners, burner element damage, or improper cookware use.
Troubleshooting:
- Regularly clean the stovetop burners to remove any mineral deposits or food residues. Use a non-abrasive cleaner for this purpose.
- If the burner elements appear damaged or discolored, consider replacing them for even heating.
- Ensure you are using cookware with flat and smooth bottoms that make proper contact with the burner surface for uniform heating.
9. Oven Fan Noise
Description: Some users may experience an unusual or loud noise coming from the oven’s fan during operation.
Cause: Noisy fans can result from debris accumulation, fan motor issues, or loose components within the oven.
Troubleshooting:
- Inspect the oven fan for any obstructions or debris that may be causing the noise. Clean and remove any foreign objects if found.
- If the noise persists, the fan motor may be faulty and require replacement.
- Check for loose screws or components inside the oven that might be vibrating during operation. Tighten them if necessary.
10. Inaccurate Oven Temperature
Description: Users may notice that the oven temperature does not match the set temperature, leading to inconsistent cooking results.
Cause: Temperature discrepancies can be caused by a faulty temperature sensor, a malfunctioning thermostat, or calibration issues.
Troubleshooting:
- Use an oven thermometer to verify the actual temperature inside the oven. If it consistently deviates from the set temperature, consider recalibrating the oven.
- If the temperature sensor is suspected to be faulty, replace it to ensure accurate temperature readings.
- If calibration issues persist, consult the user manual for instructions on recalibrating the oven or seek professional assistance.
11. Oven Door Won’t Open
Description: After cooking, the oven door may remain locked and refuse to open, causing inconvenience.
Cause: This issue can occur due to a malfunctioning door lock mechanism or a failure in the self-cleaning cycle.
Troubleshooting:
- Wait for the oven to cool down completely, as the door lock usually releases when it’s safe to open. This can take several hours.
- If the door remains locked, check the user manual for specific instructions on how to manually release the door lock mechanism.
- If manual release doesn’t work, contact customer support or a technician for assistance in resolving the issue.
12. Flickering Cooktop Indicator Lights
Description: The indicator lights on the cooktop may flicker or not illuminate properly when the burners are in use.
Cause: Flickering lights can be attributed to loose connections, a faulty control panel, or electrical issues.
Troubleshooting:
- Check the power connections to the cooktop indicator lights. Tighten any loose wires or connections if found.
- Inspect the control panel for signs of damage or wear. If it’s malfunctioning, consider replacing it.
- If the issue persists, consult an electrician to examine the electrical supply and wiring for any problems.
13. Oven Takes Too Long to Preheat
Description: Users may notice that the oven takes an unusually long time to reach the desired preheat temperature.
Cause: Slow preheating can be caused by a malfunctioning heating element, temperature sensor issues, or poor insulation.
Troubleshooting:
- Inspect the heating element for any visible damage or signs of malfunction. Replace it if needed.
- Test the temperature sensor to ensure it’s functioning correctly. Replace it if it’s providing inaccurate readings.
- If the problem persists, consider scheduling a professional inspection to assess the oven’s insulation and overall performance.
14. Cooktop Burners Won’t Turn Off
Description: Some users may encounter issues where the cooktop burners refuse to turn off even after using the control knobs.
Cause: This problem may be caused by a malfunctioning burner switch, control board issues, or electrical faults.
Troubleshooting:
- Turn off the power supply to the cooktop immediately if the burners won’t turn off. This can help prevent accidents.
- Inspect the burner switches for signs of damage or wear. If they are faulty, replace them.
- If turning off the power didn’t help, contact a qualified technician to examine the control board and wiring for any problems.
15. Oven Door Not Sealing Properly
Description: Users may notice that the oven door doesn’t seal tightly, allowing heat to escape and affecting cooking results.
Cause: Poor door sealing can occur due to a damaged gasket, misaligned door hinges, or worn-out springs.
Troubleshooting:
- Inspect the oven door gasket for any visible damage or signs of wear. Replace it if necessary.
- Check the alignment of the door hinges. Adjust them to ensure the door seals properly when closed.
- If the issue persists, examine the door springs and replace any that are worn out or broken.
16. Oven Fan Running Loudly
Description: Some users may experience a loud or unusual noise coming from the oven’s fan during operation.
Cause: A noisy fan can result from a malfunctioning fan motor, debris inside the fan, or worn-out bearings.
Troubleshooting:
- Inspect the oven fan for any visible debris or obstructions. Clean and remove any foreign objects if found.
- If the noise persists, the fan motor may be faulty and require replacement.
- Check for worn-out bearings in the fan. If they are the source of the noise, consider replacing them.
17. Cooktop Controls Unresponsive
Description: The controls for the cooktop burners may become unresponsive, making it difficult to adjust temperatures.
Cause: Unresponsive controls can be due to a malfunctioning touchpad, control board issues, or electrical problems.
Troubleshooting:
- Try resetting the cooktop controls by turning off the power for a few minutes and then turning it back on.
- If the controls remain unresponsive, inspect the touchpad for damage or wear. Replace it if needed.
- If the issue persists, consult a technician to examine the control board and electrical components for faults.
18. Cooktop Indicator Stays On
Description: The indicator light for a cooktop burner may stay illuminated even after the burner has been turned off.
Cause: This problem can be caused by a malfunctioning switch, a control board issue, or wiring problems.
Troubleshooting:
- Turn off the power to the affected burner if the indicator light remains on. This can prevent overheating.
- Inspect the burner switch for the problematic burner. If it’s damaged, consider replacing it.
- If the issue persists, consult a technician to examine the control board and wiring for any issues.
19. Oven Door Glass Fogging Up
Description: Users may notice that the inner glass of the oven door fogs up during cooking, obstructing the view.
Cause: Fogging can occur due to a damaged or compromised door seal, allowing moisture to enter the space between the glass panels.
Troubleshooting:
- Inspect the oven door seal for any visible damage or gaps. Replace it if necessary to maintain a proper seal.
- If moisture has already entered between the glass panels, consult the user manual for instructions on disassembling the door to clean and dry the glass.
- Regularly check and maintain the door seal to prevent future fogging issues.
20. Oven Light Not Working
Description: The oven’s interior light may fail to turn on, making it challenging to monitor cooking progress.
Cause: A non-functioning light can be attributed to a burnt-out bulb, a faulty light socket, or electrical issues.
Troubleshooting:
- Turn off the power to the oven and allow it to cool. Then, replace the oven light bulb if it’s burnt out.
- If replacing the bulb doesn’t solve the problem, check the light socket for any damage or loose connections. Repair or replace it as needed.
- If the issue persists, consult a technician to assess the electrical components and wiring associated with the oven light.
21. Inaccurate Oven Timer
Description: The oven timer may not count down accurately, which can affect cooking times.
Cause: An inaccurate timer can be due to a malfunctioning timer control, a worn-out timer knob, or electrical issues.
Troubleshooting:
- Verify the accuracy of the timer by using a separate timer or stopwatch. If the oven timer consistently runs too fast or too slow, consider replacing it.
- Inspect the timer knob for damage or wear. If it’s difficult to turn or doesn’t engage properly, replace the knob.
- If the issue persists, consult a technician to examine the timer control and associated electrical components.
22. Oven Light Stays On
Description: The oven interior light may remain illuminated even when the oven is turned off.
Cause: This issue can be caused by a faulty oven light switch, control board problems, or wiring issues.
Troubleshooting:
- Turn off the power to the oven to prevent overheating. If the light remains on, check the oven light switch for damage and replace it if necessary.
- Inspect the control board for any signs of malfunction or damage. Replace it if needed.
- If the problem persists, consult a technician to examine the wiring and electrical components associated with the oven light.
23. Cooktop Burners Not Heating to Full Power
Description: Some users may find that the cooktop burners do not reach their maximum heating capacity.
Cause: Burners not heating properly can result from a defective burner element, control switch issues, or electrical faults.
Troubleshooting:
- Inspect the burner element for signs of damage or discoloration. Replace it if it’s not functioning at full power.
- Check the control switch for the affected burner. If it’s malfunctioning, consider replacing it.
- If the issue persists, consult a technician to examine the electrical components and wiring associated with the cooktop burners.
24. Oven Door Handle Loose
Description: The oven door handle may become loose or wobbly over time, affecting its functionality.
Cause: A loose handle can result from loose screws, worn-out handle components, or repeated stress on the handle.
Troubleshooting:
- Tighten the screws securing the oven door handle to the door. This may solve the issue if it’s caused by loose screws.
- If the handle remains loose, inspect the handle components for wear or damage. Replace any worn-out parts.
- Consider using the oven handle with care to prevent excessive stress and maintain its stability.
25. Oven Door Not Closing Securely
Description: Users may find that the oven door does not close securely, allowing heat to escape.
Cause: Poor door closure can occur due to a misaligned door, damaged door gasket, or worn-out hinges.
Troubleshooting:
- Check the alignment of the oven door. Adjust it to ensure that it closes securely and forms a proper seal.
- Inspect the oven door gasket for damage or wear. Replace it if necessary to maintain a tight seal.
- Examine the hinges for signs of wear or damage. Replace any worn-out or damaged hinges to improve door closure.
GE JB655SKSS Electric Range User Reviews
Customer reviews are a valuable source of feedback for potential buyers, offering insights into real-world experiences with the GE JB655SKSS Electric Range. We’ve compiled both positive and negative user reviews from Costco.com to help you make an informed decision about this appliance. Please note that these reviews are summarized for clarity and do not include feedback related to shipping, warranty, or customer service issues.
Positive Reviews from GE JB655SKSS Electric Range Users
- Some users were satisfied with the following parameters associated with their positive experience:
- The cooktop heats quickly, with a powerful left front burner for faster boiling and a large right front burner for accommodating large pots.
- The oven bakes evenly, making it suitable for various cooking tasks.
- Ample storage space in the large storage drawer, providing convenience.
- Appreciation for the self-cleaning oven cycle, ensuring easy maintenance.
- Positive comments on the broiler and the automatic oven light feature.
- The air fryer function was noted as a valuable addition for achieving crispy results.
- Overall, users found the GE JB655SKSS Electric Range to be a good option for its price, with reliability and ease of use.
Negative User Reviews of the GE JB655SKSS Electric Range
- Some users expressed dissatisfaction with the following issues related to their experience:
- Oven temperature discrepancies and variations, with some users reporting difficulty in maintaining the set temperature.
- Reports of cracked stove tops, leading to concerns about the product’s durability and cosmetic issues.
- Complaints about the difficulty in cleaning the stove’s glass top and maintaining its appearance.
- Challenges with the “Air Fry” feature and a lack of an included operating manual.
- Concerns about the design of the bottom pan drawer, which may pose difficulties when opening the drawer.
- Issues with the stovetop’s susceptibility to water marks, requiring frequent cleaning.
The majority of users were satisfied with their experience with the GE JB655SKSS Electric Range, appreciating its cooking performance, storage space, and added features. However, some users encountered issues related to oven temperature control, stove top durability, and cleaning. When considering this appliance, it’s essential to weigh these user experiences alongside your own cooking needs and preferences.
GE JB655SKSS Electric Range Manual
You can find the operating instructions and user manual for the GE JB655SKSS Electric Range on the manufacturer’s website: GE Appliances.
GE JB655SKSS Electric Range Frequently Asked Questions
1. How can I clean the glass top of the GE JB655SKSS Electric Range?
To clean the glass top of the GE JB655SKSS Electric Range, follow these steps:
- Allow the cooktop to cool completely.
- Use a cooktop cleaner recommended by the manufacturer or a mixture of baking soda and water to clean the surface.
- Apply the cleaner or mixture to the glass top and gently scrub with a non-abrasive scrubbing pad.
- Rinse thoroughly with clean water and dry with a soft cloth to prevent water spots.
2. Why is the oven temperature not accurate on my GE JB655SKSS Electric Range?
Inaccurate oven temperatures can be caused by various factors. Here are some troubleshooting steps:
- Verify that you are following the recommended preheating time provided in the user manual.
- Consider using an oven thermometer to check the actual temperature inside the oven and compare it to the set temperature.
- If you notice a significant difference, you may need to recalibrate the oven temperature according to the user manual instructions.
- If the issue persists, it’s advisable to contact customer service or a technician for further assistance.
3. Can I use large saucepans on the rear burners of the GE JB655SKSS Electric Range?
The design of the GE JB655SKSS Electric Range may limit the size of saucepans that can be used on the rear burners. Typically, only small saucepans will fit on the rear burners due to the control panel overhang. If you frequently use large saucepans, it’s essential to consider this limitation when using the rear burners.
Conclusion
Always refer to the manual, customer service, or the service center whenever possible if you encounter any problems with your GE JB655SKSS Electric Range. They can provide you with specific guidance and solutions to address any issues effectively.
LG LSEL6335F Common Problems and Troubleshooting